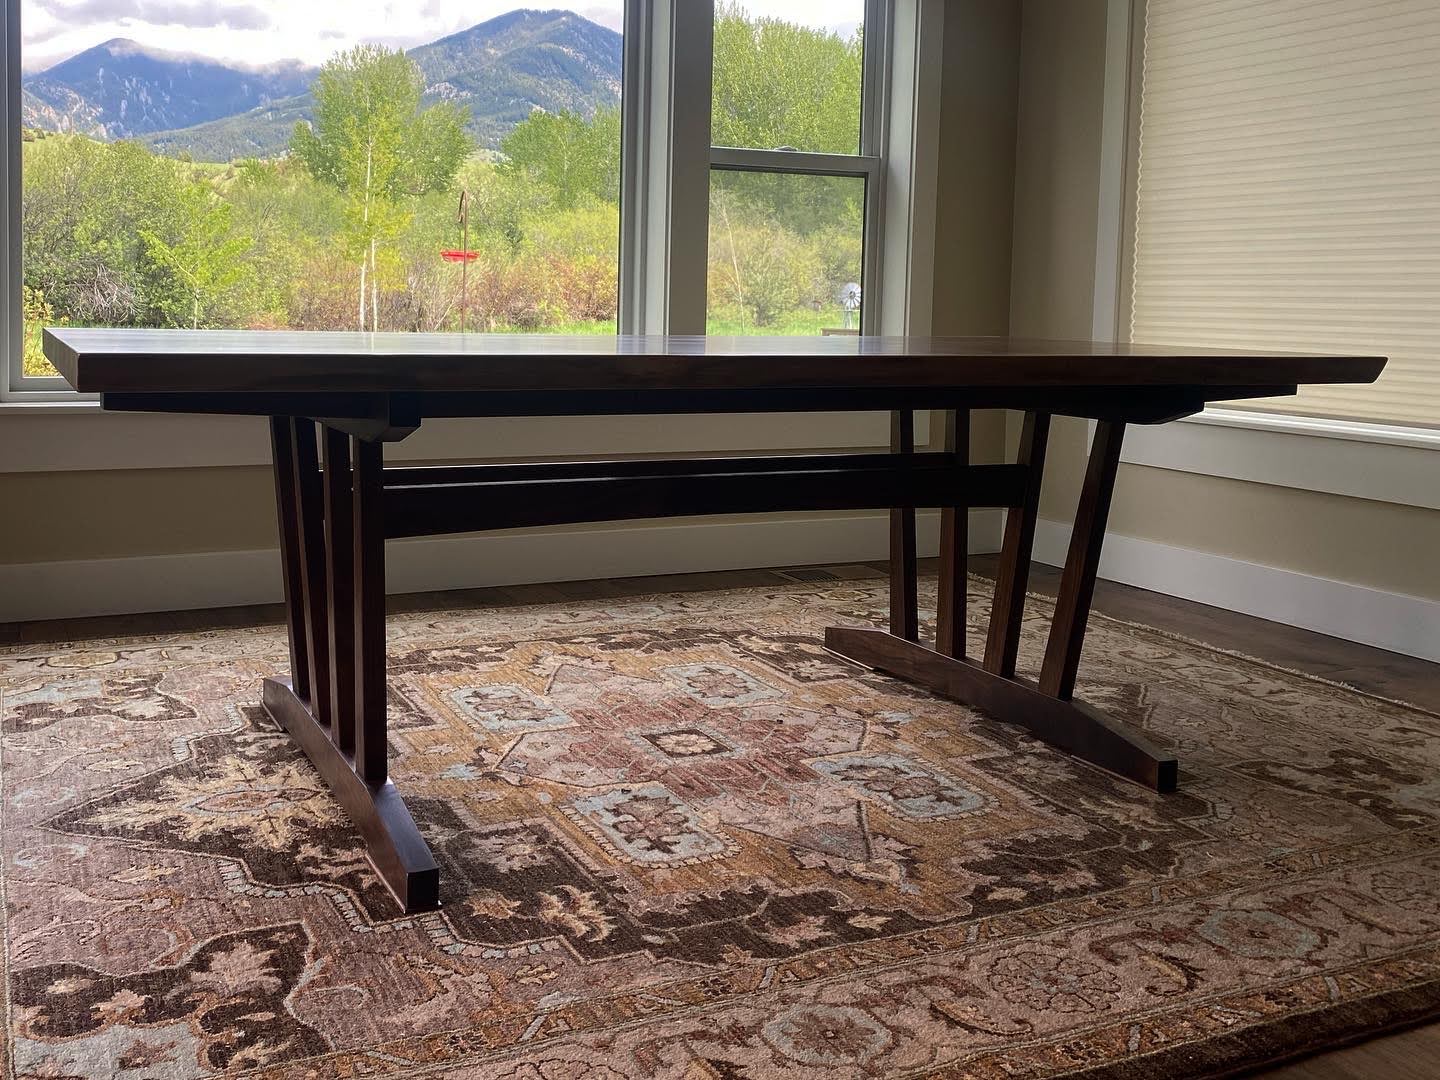
Here at Dovetail Design, located in Southeastern Idaho, we strive to do our best work and pay attention to the details which is why we always choose a Livos finish.
- easy to use
- very forgiving when mistakes are made
- durable and smooth
- leaves the wood looking like wood and not plastic
- eco-friendly and not harmful
- easily repaired and refurbished. No sanding or stripping needed. Just recoat your project with another coat of Livos, work in with a Scotch Brite again and wipe off the excess. Your project will look good as new!
Keep in mind that any oil finish depends on a great sanding effort. Oil will show your mistakes in your wood prep, but here a few hints to help make your project beautiful. It's worth the extra effort to get such a beautiful, smooth finish.
SANDING:
I start with a hard pad on my air sander with a 120 grit pad or 100 grit if I see snipe on the board from the planer. I work my way through 120 grit, 180 grit, then I use a softer pad with 180 grit Mirka Abranet. The Abranet gives a slight polish to the wood. Then it is time to ease edges using sandpaper wrapped around a block. I will vacuum my boards before I start finishing, but it is not necessary to have a dust free area. That is a benefit of a hand rubbed oil finish because other work can still go on in the shop without affecting the wood finishing project.


FINISHING WITH LIVOS:
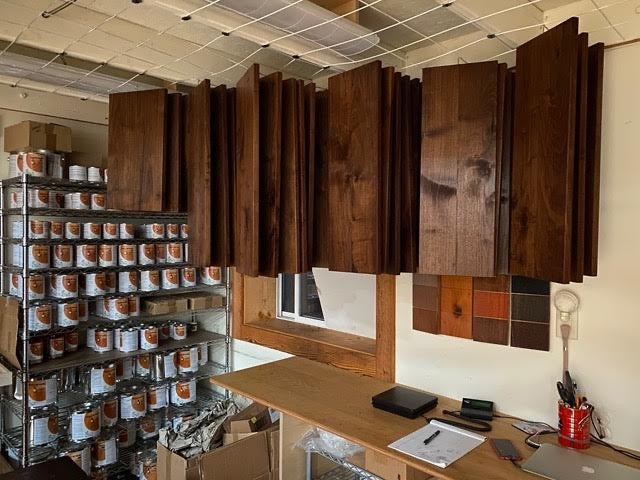
Materials management is one key to a successful outcome. For cabinet doors and drawer fronts, I hang them from the metal ceiling rack which is 4 inch mesh or in Idaho called sheep fence. Drill a small hole in an edge that will never be seen once installed and screw in a little hook.


If boards are too big or all sides will be seen when complete I use saw horses or my sanding table with a cover. I place the boards on a flat surface with stickers so I can lift and stand them on edge to brush finish on the backside.


Once I am set up I get my materials out:
- foam brush
- scotch brite pad wrapped around a block
- rags, cut so they are not too big
- always wear gloves
- and of course, Livos
To start with, I always brush the finish on the end grain first. The end grain pores will absorb more finish quickly and it will be hard to get drip marks out. Then I work on the top of the board covering with a good amount of finish. After getting the finish on I will use the scotch brite pad 360 grit or finer and gently work the finish in while wet,with the grain, on the top and the edges. Why is the scotch brite pad necessary?
- it helps the oil penetrate into the wood pores
- it knocks down the wood fibers for a smoother finish
- you can correct slight sanding mistakes like pigtails by gently going over your piece
- it helps spread the finish more evenly


.
I start with four rags. I use two at first to grab a wet board that is hanging or a board on the saw horses. I wipe it down which also helps to spread more finish around. I then change to dry rags for a final wipe. I am able to use these rags many times over. When the wet rags get too soaked with finish I replace them with the dry rags and get two more dry rags. I will place the wet rags in a fireproof bucket before taking them outside and lay them out to dry at the end of the day. Only flat boards are shown in these pictures. For door corners or grooves I will wrap a rag around a scraper or putty knife to get in the corners. It is important to get all the standing finish off or it will not dry correctly and may leave a shiny area.
I add small pieces of rags in between the underside of the board and the sticker to keep them from sticking together. Hanging the boards allows for even drying all round the board and it is easy for them to be safely out of the way.

Dispose of rags properly. They can be combustible if wet with a Livos finish.
In the end everyone has a different tips and techniques to use Livos products. This is just the steps we have found to be easy and produce a beautiful finish. Clink the link here to get the application steps from the manufacturer.
Thanks for reading:)